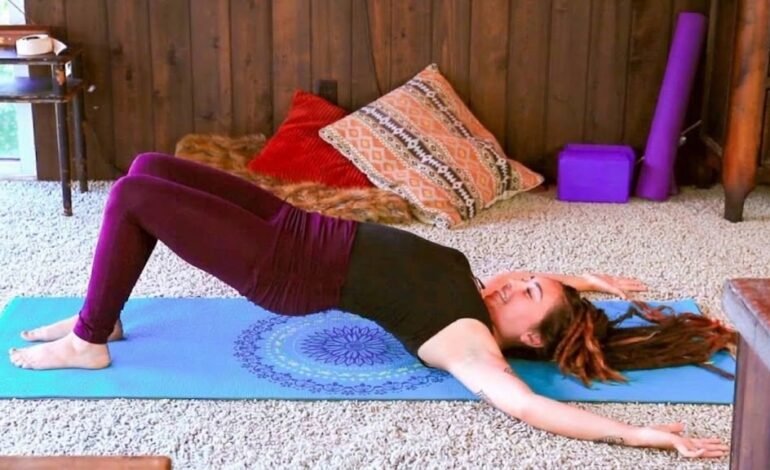

Restorative Yoga:
Restorative Yoga is a gentle yoga practice that focuses on supporting the body, promoting relaxation and encouraging comfortable breathing.
Use of Props:
It uses pillows, folded blankets, bolsters and yoga blocks to make poses more comfortable and provide adequate support.
Main Purpose:
The goal is not to forcefully stretch the body but to relax in supported positions and help reduce feelings of physical tension.
History
B.K.S. Iyengar and Judith Hanson Lasater played important roles in the modern development of Restorative Yoga. Iyengar popularized the use of props and supported yoga poses while Lasater helped develop and promote Restorative Yoga as a relaxation-focused practice.
Connection to Chronic Pain:
Restorative Yoga may help some people relax and manage stress while living with chronic pain. However there is no guarantee that it will permanently cure chronic pain.
Restorative Yoga For Chronic Pain- Gentle Restorative Yoga Poses
1. Supported Child’s Pose
Legs Up the Wall Pose is a gentle option in restorative yoga for chronic pain, allowing you to rest on your back while supporting your legs against a wall. It requires little movement and may help promote relaxation, reduce stress and provide a comfortable break from daily activities. For some people living with chronic pain, this supported position may offer a calming way to relax the body.
How to Practice Supported Child’s Pose:
- Kneel on a yoga mat and place a pillow or bolster in front of your body.
- Slowly lean forward and rest your chest and upper body on the support.
- Turn your head to one side or use additional support to keep your neck comfortable.
- Let your arms rest naturally beside the pillow or in front of you.
- Breathe gently and remain in the position for 30 seconds to one minute, provided it feels comfortable.
Tips for Comfort: Avoid forcing your hips toward your heels or stretching beyond your comfortable range. If kneeling or bending forward increases your pain, stop and choose a more comfortable resting position.
2. Legs Up the Wall Pose
Legs Up the Wall Pose is a gentle restorative yoga position that allows you to rest on your back while supporting your legs against a wall. It requires little movement and can help promote relaxation, reduce stress, and provide a comfortable break from daily activities. For some people living with chronic pain, this supported position may offer a calming way to relax the body.
How to Practice Legs Up the Wall Pose:
- Sit sideways next to a wall with a yoga mat underneath you.
- Gently lower your upper body onto the mat while turning onto your back.
- Slowly raise your legs and rest them against the wall.
- Move your hips farther away from the wall if you feel tension in your hamstrings or lower back.
- Place a folded blanket or small pillow beneath your head if needed.
- Relax your arms beside your body and breathe naturally for one to five minutes as long as the position feels comfortable.
Tips for Comfort: Keep your lower back in a natural, relaxed position instead of forcing it flat against the floor. Bend your knees slightly or move farther from the wall if needed. Stop if you experience increased pain, numbness or discomfort. If getting down to the floor or raising your legs is difficult choose another supported resting position.
3. Supported Reclined Bound Angle Pose
Supported Reclined Bound Angle Pose is a relaxing yoga position that gently opens the hips while allowing the back to rest on the floor. Cushions placed beneath the thighs help support the legs and prevent unnecessary strain. For people living with chronic pain, this pose may offer a comfortable opportunity to relax without forcing the hips or lower back into a deep stretch.
How to Practice Supported Reclined Bound Angle Pose:
- Lie on your back on a yoga mat keeping your head comfortably supported.
- Bend your knees and bring the soles of your feet together.
- Allow your knees to move outward only as far as feels comfortable.
- Place firm cushions or folded blankets beneath both thighs to support their weight.
- Rest your hands beside your body and breathe naturally for 30 seconds to two minutes.
Tips for Comfort: Keep enough support beneath your thighs so your knees do not hang unsupported. If you feel pulling in your hips or discomfort in your lower back, bring your knees closer together and return to a neutral resting position if needed.
4. Constructive Rest Pose
Constructive Rest Pose is a simple resting position that keeps the knees bent and the feet supported on the floor. Unlike poses that involve stretching or twisting this position allows you to settle into a neutral, comfortable posture with minimal effort. It may be a useful option for people with chronic pain who prefer gentle relaxation without complicated movements.
How to Practice Constructive Rest Pose:
- Lie on your back on a comfortable mat or carpeted surface.
- Bend your knees and place your feet flat on the floor, about hip-width apart.
- Position your heels a comfortable distance from your hips.
- Let your arms rest beside your body with your palms facing up or down.
- Adjust your head and neck with a thin pillow if necessary.
- Remain in this position for two to five minutes while breathing comfortably.
Tips for Comfort: Avoid deliberately pressing your lower back into the floor or tightening your abdominal muscles. Let your body settle naturally and adjust your feet or add a cushion beneath your head if needed. If lying flat increases your discomfort try resting in a supported position instead.
5. Supported Savasana
Supported Savasana is a restorative yoga pose designed to encourage full-body relaxation without requiring active stretching. By placing a bolster beneath the knees and a small pillow under the head, you can create a more comfortable resting position. This pose may be helpful for people with chronic pain who want to relax after a busy day or finish their yoga practice calmly.
How to Practice Supported Savasana:
- Lie on your back on a yoga mat in a quiet, comfortable space.
- Place a bolster or firm pillow beneath your knees to support your legs.
- Position a thin folded blanket under your head if your neck needs extra support.
- Let your hands rest loosely beside your body, with your shoulders relaxed.
- Close your eyes if comfortable and allow your breathing to remain natural.
- Rest for three to five minutes, paying attention to the feeling of support beneath your body.
Tips for Comfort: Choose supports that keep your neck and knees comfortable without creating pressure. If lying on your back aggravates your symptoms, change positions rather than trying to remain still. You can also keep your eyes open if closing them makes you uncomfortable.
6. Gentle Reclined Spinal Twist
Gentle Reclined Spinal Twist introduces a small, controlled rotation while your body remains supported by the floor. This pose may help some people explore comfortable spinal movement and relax the muscles around the hips and back. Keeping the twist shallow is especially important for anyone living with chronic pain, as deeper rotation may aggravate certain symptoms.
How to Practice Gentle Reclined Spinal Twist:
- Lie on your back with your knees bent and your feet resting on the mat.
- Extend your arms out to the sides in a comfortable position.
- Slowly guide both knees a short distance toward your left side, keeping the movement gentle.
- Place a pillow beneath your knees if they need extra support.
- Hold the position for 15–30 seconds while breathing naturally, provided it feels comfortable.
- Bring your knees back to the center and repeat on the opposite side only if the movement feels suitable.
Tips for Comfort: Keep both shoulders relaxed and avoid forcing them against the floor. Your knees do not need to touch the mat. Skip this pose if twisting increases your pain, causes tingling or sends discomfort down your leg.
7. Supported Reclining Pose
Supported Reclining Pose offers a comfortable way to rest while using pillows or a bolster to support the upper body. Unlike poses that involve bending or twisting, this position focuses on finding a relaxed posture with minimal physical effort. It may be a suitable option for people with chronic pain who prefer gentle rest rather than active movement.
How to Practice Supported Reclining Pose:
- Sit on your mat and position a bolster or firm pillow behind your upper body.
- Slowly lower yourself onto the support, allowing your back to rest at a comfortable angle.
- Place a small cushion beneath your head so your neck remains relaxed.
- Bend your knees and support them with pillows if that feels more comfortable.
- Let your arms rest naturally beside your body and breathe without forcing a particular rhythm.
- Remain in the position for two to five minutes, adjusting your supports whenever necessary.
Tips for Comfort: Keep your body at an angle that feels easy to maintain rather than lying completely flat if that causes discomfort. Make sure your pillows or bolster are stable before settling into the pose. If your symptoms worsen, change position or stop the practice.
Sum up
Restorative yoga for chronic pain can be a gentle way to relax your body, manage stress and find more comfort in daily life. These seven supported poses allow you to rest without requiring intense movement or flexibility. Remember that everyone experiences chronic pain differently, so choose poses that feel comfortable and use pillows or blankets for extra support. Start slowly, listen to your body and stop any pose that increases your pain. Restorative yoga is not a cure for chronic pain but it may be a helpful addition to your overall pain management routine.
For more information also read this…..https://westrnhealth.com/category/fitness/weight-loss/
FAQs About Restorative Yoga For Chronic Pain
1. What is restorative yoga for chronic pain?
It uses gentle, supported poses to encourage relaxation and reduce stress without intense movement.
2. Can restorative yoga help with chronic pain?
It may help manage stress and improve relaxation but results vary from person to person.
3. How often should I practice restorative yoga?
Start with two or three sessions per week and adjust based on your comfort.
4. How long should I hold each restorative yoga pose?
Try holding each pose for 2–5 minutes or less if needed.
5. Is restorative yoga suitable for beginners?
Yes most poses are beginner-friendly when properly supported and modified.
6. What props do I need for restorative yoga?
You can use pillows, blankets, bolsters and yoga blocks for extra support.
7. Can restorative yoga reduce stress?
Yes, gentle poses and relaxed breathing may help reduce stress and tension.
8. Which restorative yoga pose is best for chronic pain?
There is no single best pose. Choose one that feels comfortable for your body.
9. Can I practice restorative yoga every day?
You may practice daily if it feels comfortable and does not worsen your symptoms.
10. Is restorative yoga a cure for chronic pain?
No. but it may complement a treatment plan recommended by your healthcare professional.